Nail printers have revolutionized the beauty industry, allowing users to create intricate and professional-looking nail art at home. If you're a beginner, using a nail printer can be a fun and exciting experience. However, to achieve the best results, it's essential to know a few quick hacks that can make your nail printing process smoother and more efficient.
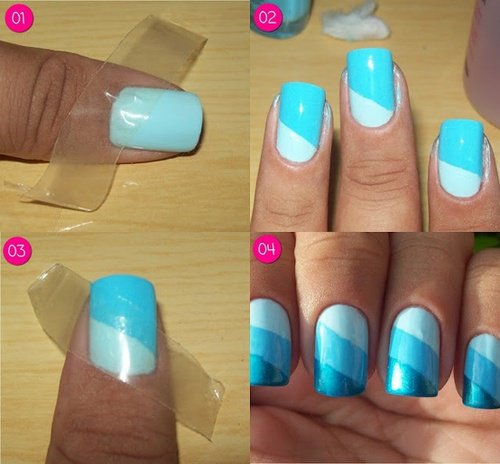
1. Prep Your Nails Properly
Before using a nail printer, ensure your nails are clean and dry. Any dirt or oil can prevent the design from adhering properly. Apply a base coat and let it dry completely to create a smooth canvas for printing.
2. Use High-Quality Nail Polish
Not all polishes work well with nail printers. For the best results, use a polish that is compatible with your machine. Quick-dry polishes can sometimes affect adhesion, so it's better to use a regular polish that allows the design to stick properly.

3. Calibrate Your Printer
If your design isn’t aligning correctly with your nail, you might need to recalibrate the printer. Most nail printers come with a calibration tool or software to ensure precise placement. Always follow the manufacturer’s instructions for calibration.
4. Choose High-Resolution Images
Blurry or pixelated images will result in poor-quality prints. Always use high-resolution images for better clarity and detail. If your printer allows, adjust the image settings to enhance sharpness before printing.

5. Apply a Thin Layer of Gel Base Coat
A thin layer of a gel base coat can help the design adhere better. Cure it under a UV lamp before printing for the best results. This ensures that the ink sticks properly and lasts longer.
6. Position Your Finger Correctly
Incorrect finger placement can lead to misaligned prints. Ensure your finger is positioned in the center of the printing area and remains steady during the process. Some printers come with finger holders to help with positioning.

7. Test Before Printing on Nails
To avoid mistakes, test your design on a nail tip or paper before printing directly on your nails. This helps in checking color vibrancy, alignment, and print quality.
8. Seal the Design with a Top Coat
After printing, apply a high-quality top coat to seal the design and prevent smudging. For longer-lasting results, use a gel top coat and cure it under a UV lamp.
9. Clean the Printer Regularly
Ink and residue buildup can affect the performance of your nail printer. Clean the printer nozzle and trays regularly to maintain high-quality prints.
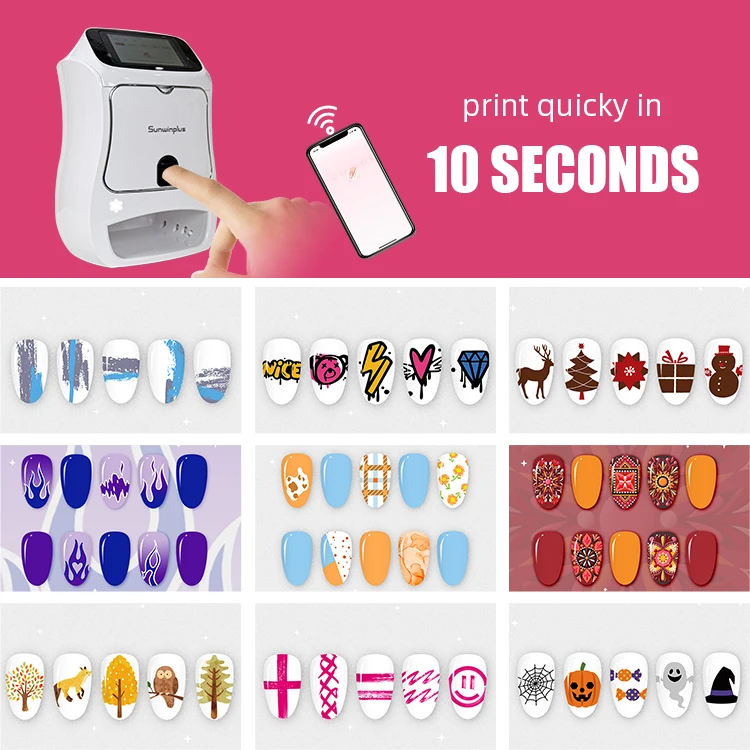
10. Experiment with Custom Designs
One of the best features of a nail printer is the ability to create custom designs. Try uploading your own patterns, photos, or artwork to add a personal touch to your nails.
Final Thoughts
Using a nail printer can elevate your nail art game, making it easier to achieve professional-quality designs at home. By following these quick hacks, beginners can avoid common mistakes and enjoy a smooth and hassle-free nail printing experience. Have fun experimenting with different designs and techniques to make your nails stand out!
Do you have any favorite nail printer hacks? Share them in the comments!
Comments
Post a Comment